
Lightroom Denoise
The big feature of Lightroom Classic 12.3 was Denoise. Why didn’t I cover this sooner? While I’ve been quiet on posting due to work, I’m constantly writing for Digital Camera World, Photoshop User, a new client, and of course I had The Lightroom Conference. But a short break now allows me time to get a short post about what to me is one of the most vital new additions to Lightroom Classic. In the past few years, programs and plugins have swept in to fill the gap where Lightroom in all forms has been lacking: Noise Reduction. DxO’s Pure Raw with its DEEPPrime AI, or Topaz Photo AI both do an excellent job of sharpening and reducing noise in Raw files.
Adobe is now closing that gap with its new AI based Denoise tool. Technically it’s part of the Enhance features which includes Enhance and Super Resolution. Super Resolution is not hooked up yet but soon will be. I know you’re thinking, what’s special about noise reduction in the 2020’s? The camera’s have amazing low light performance, Well yes that’s true, but it also means that you can push them even harder and get shots you wouldn’t be able in the past.
Concert shots are one area, especially in smaller venues. You’re forced to push the ISO to get anything. Wildlife with a long lens requires higher ISO to prevent camera shake, which needs a higher ISO. Even simple things like shooting handheld at night. These are reasons why you need Denoise, and need it in the Raw pipeline. Processing outside the pipeline can add noise, so it’s best done before anything for the best change of retaining quality.
In Concert

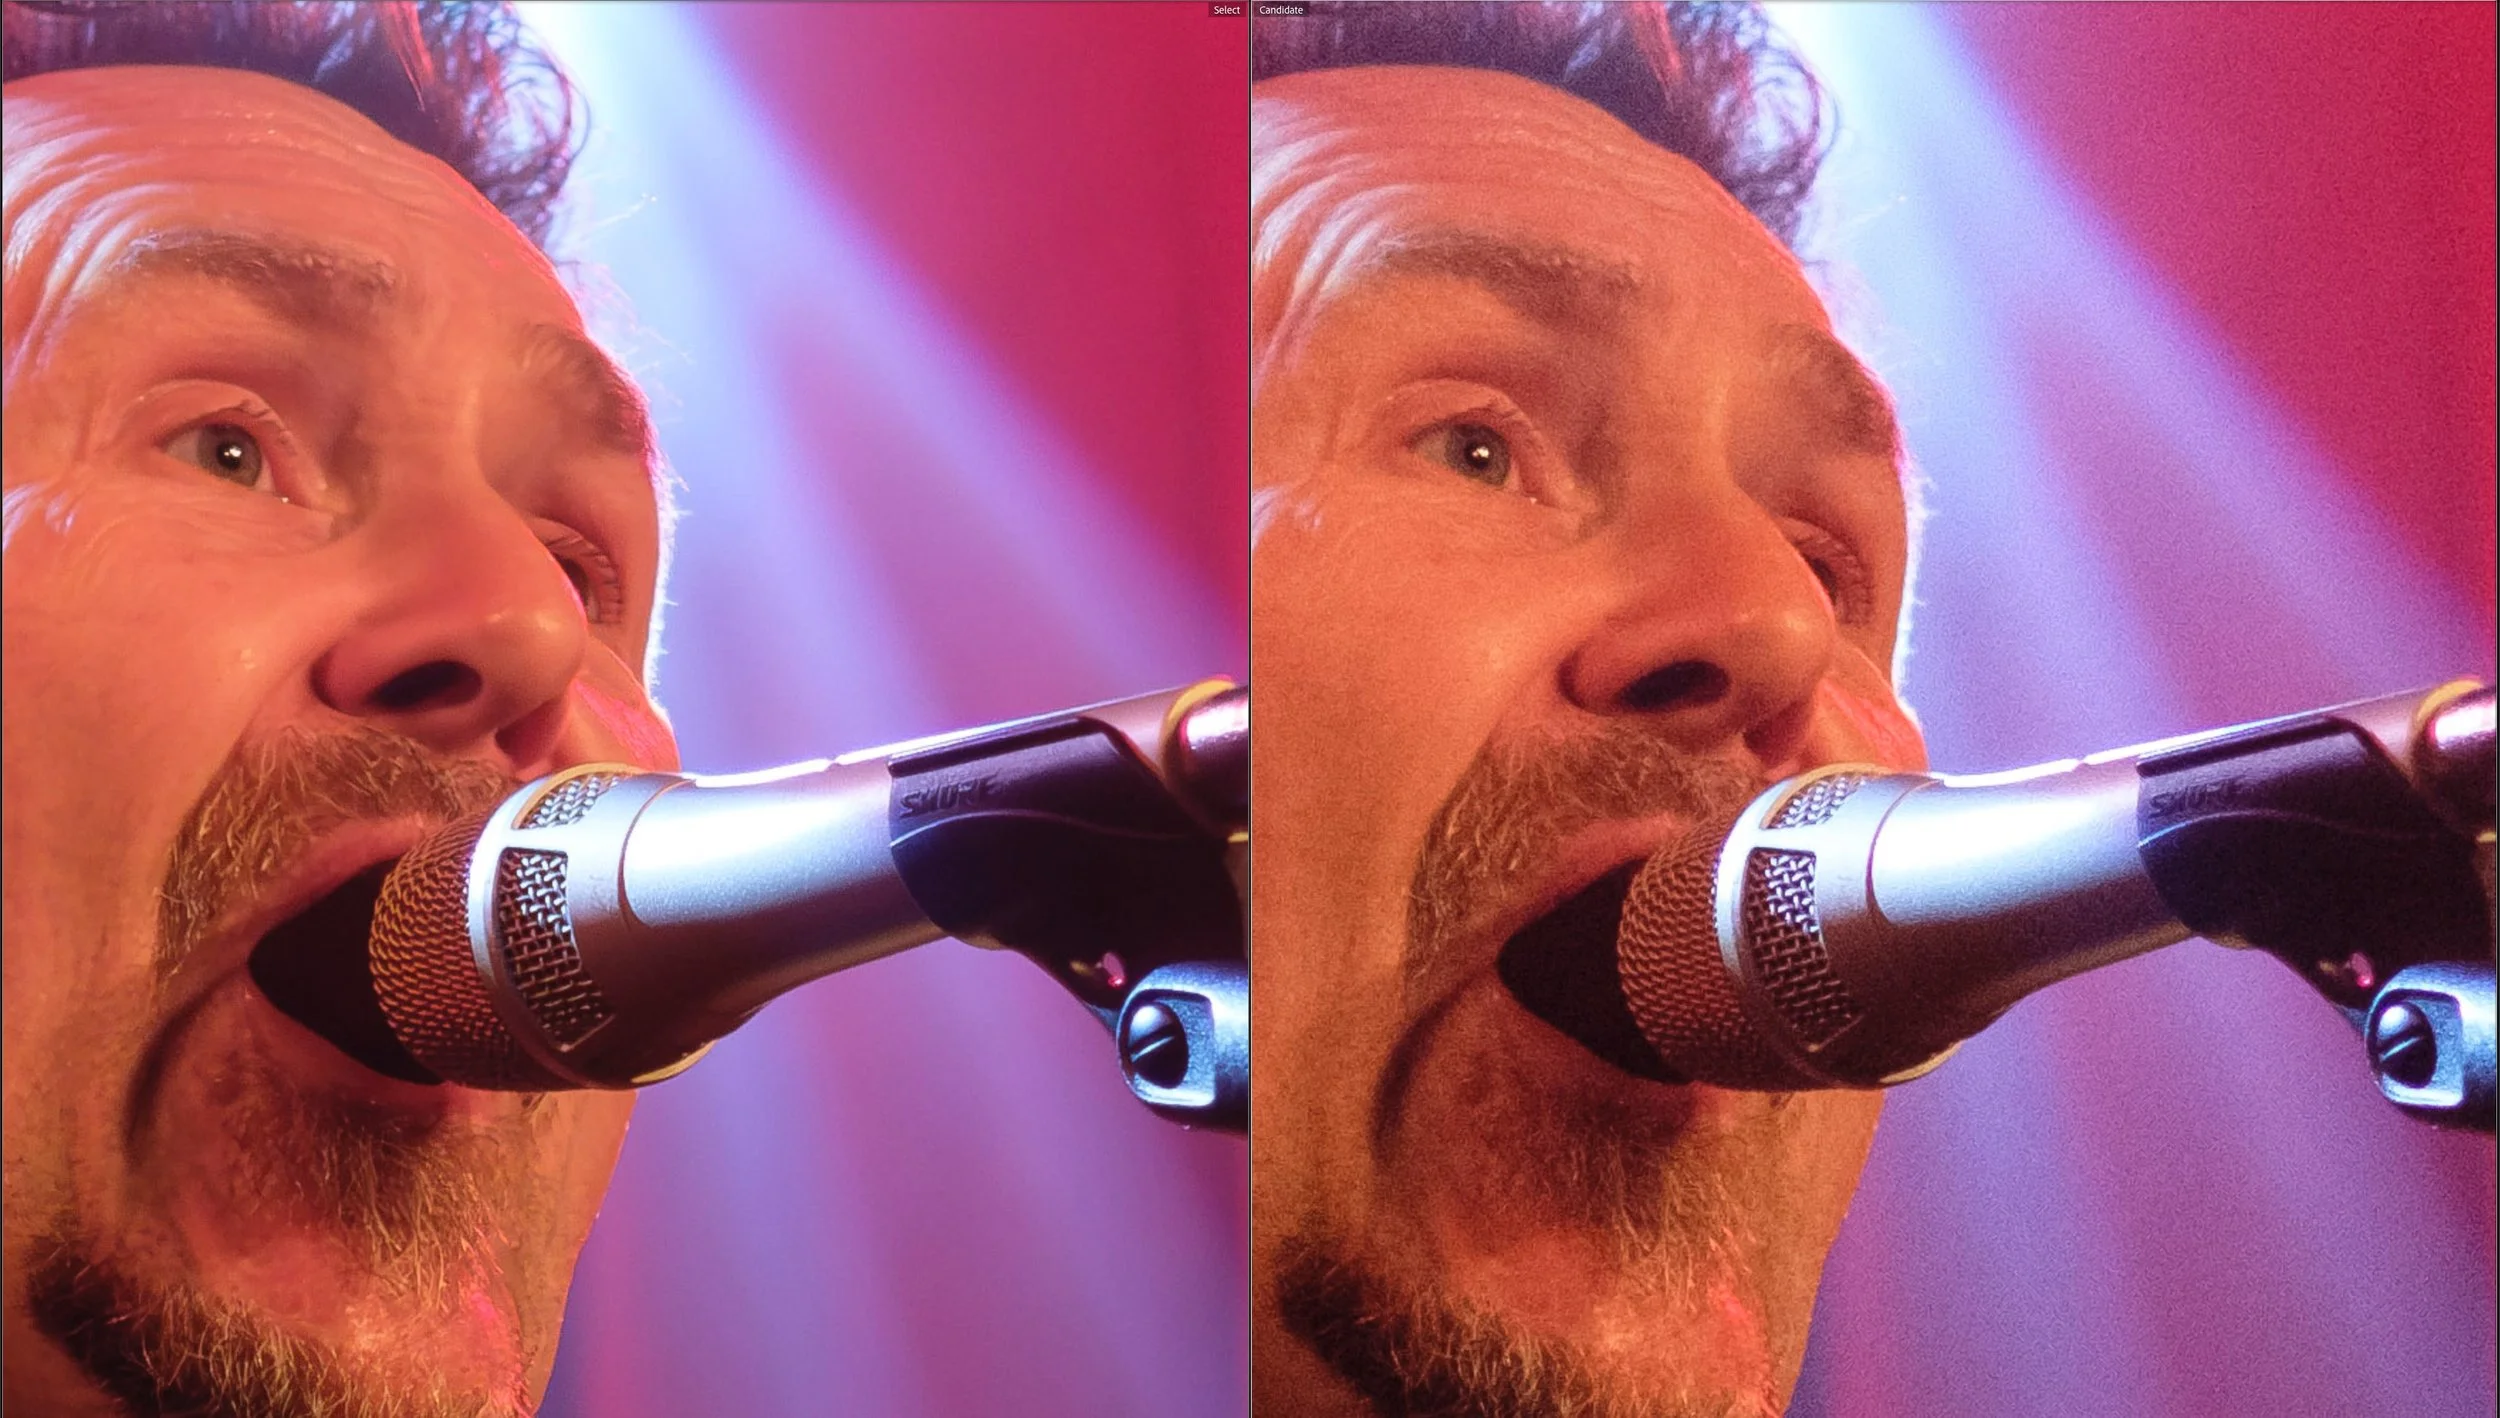
Here’s our before image, Andy Cairns of Therapy? in Roisin Dubh.. Hard to see noise at this size with this ISO3200, so here’s a crop:

It’s really good, but still it can be better. Denoise is part of the Detail panel in Develop. The original sliders are now behind a disclosure section called ‘Manual Noise Reduction’. Above these is the Denoise button. If you have a compatible file, which currently is undemosaiced Raw (so no sRaw or mRaw), you can press this to start processing. Compressed Raw works as well.

After pressing the Denoise button the Enhance Preview dialog will load. Raw Details is selected but greyed out. Super Resolution is off and also greyed out. The Denoise slider is set at a level that the AI thinks is appropriate for this image and the checkbox is on. Clicking and dragging in the preview area will give a before-then-after view of the newly selected area. You can opt the create a stack. You’ll see an estimated time to process, and get the information that a new DNG will be created. Press Enhance to create the denoised file.

The new DNG will load on completion at the top of a stack if you selected it. Using Compare view, you can see the difference.
Even at this reduced size for web, the difference is obvious. The image here has no other processing applied, but generally Denoise will copy the settings from the original image after the processing has completed so they look similar.

In Nature
On my first visit to the Saltee Islands (I so need to go back, and this week would’ve been perfect), we were allowed stay overnight. Alas this is no longer an option. After an enjoyable camp, the following morning was very overcast, but the puffins were back in. I was shooting on the EOS 20D, which although it had much better noise than the 10D or the D60 before it. It really wasn’t great. I had to shoot at ISO800 to have any hope. Of course, if I’d known technology would improve, I’d have shoot at ISO1600. Unheard of at the time.

Here’s the original, with only a mild amount of Exposure added. As this is a full Raw, Denosie can work with it.

Essentially the same as the previous image, just with a shorter estimated time. Let’s look at the before and after. I’ve added some sharpening to the image to compensate for the softness of the lens.

Here’s the final edited image.

In Outer Space
Shots of the sky with a wide field generally require a shutter speed of under 30 seconds, so even with fast primes, you still have higher ISO. Here’s a typical shot from the Samyang 12mm f2.0 processed with Denoise.

Here’s the final version with some editing applied. It’s only very general with no brushes being used on the Milky Way.

Turn down that noise!
Obviously you can use this on other older photos of any kind where you used less that ideal ISO settings to get the shot. The other major advantage is that now you know that you can remove noise easily, it allows the opportunity for more extreme settings to get the shot. Thank you Adobe.